
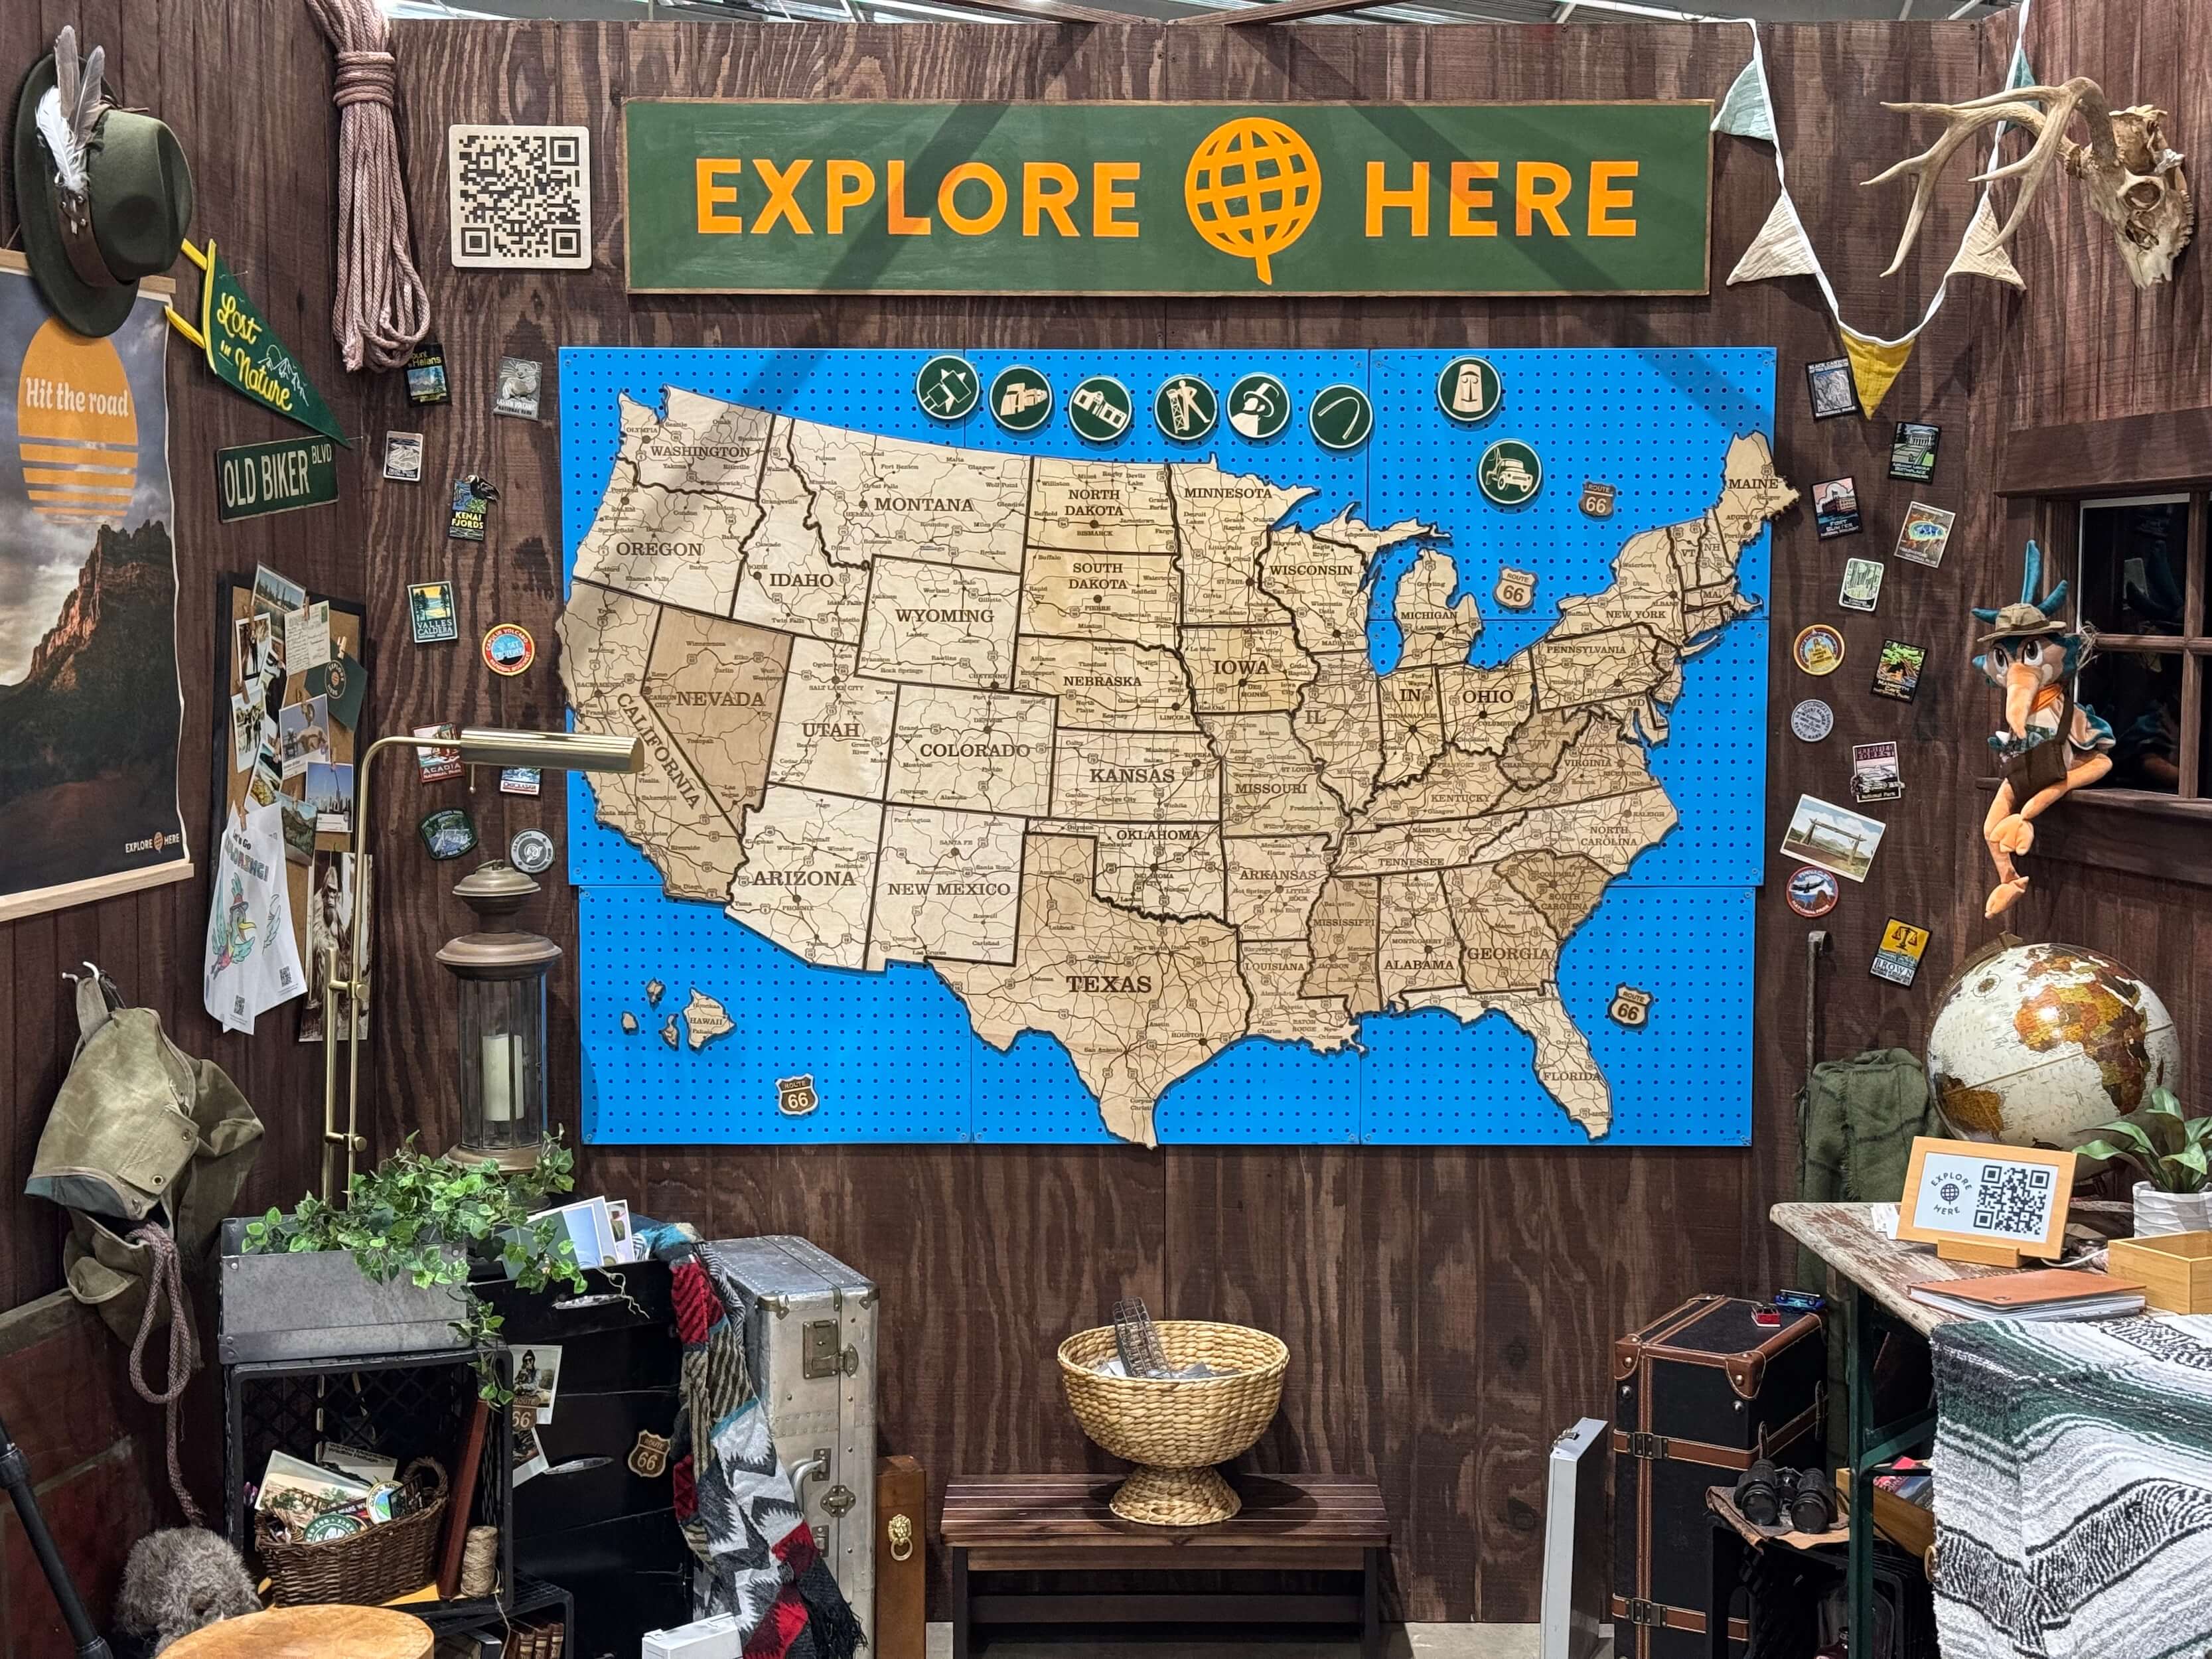

If you stopped by our booth at Road Fest this year, you probably noticed the map first. It's a wooden cutout of the whole United States, big enough to fill the back wall. Every state is its own piece, and each one is burned with highways, cities, and Route 66. I want to tell you how it came together. The honest version involves a wall I ran into, a stranger on Etsy who bailed me out, and a whole lot of hours watching a laser move back and forth.
It started with a simple goal. RoadFest was our first-ever booth, a 10x10 space in Tulsa, and I wanted it to feel like somewhere you'd want to linger. Not just a table with a banner. The idea we landed on was a game. We made icons for landmarks along Route 66 (Cadillac Ranch, the Blue Whale, the Golden Driller) and had visitors guess which state each one is in. For that, I needed a centerpiece. A map. I didn't want a poster, though. I wanted something with a bit more oomph.
I'd just finished another build at MAKE Santa Fe, our local makerspace. It was a split-flap display, and it's where I first learned to use the laser cutter. So I figured I could put those skills to use and just cut the map myself, out of plywood.

Designing for a laser turned out to be its own puzzle. I found an SVG outline of the US, pulled in the highway system, and started layering text on top. It looked great on screen. Then I went to export it and hit a wall. The laser needs every shape to be separate and non-overlapping. If I lay "Santa Fe" over a highway line, the laser cuts the highway, then fills the text. Where the two overlap, it burns twice as deep and leaves a gouge. A laser design has to be built the right way from the start, with the machine in mind. You can't just decorate it after the fact.
I really didn't want to make a bunch of mask layers and split all my lines into sub-lines. So I turned to the internet to see if someone had already done the work. To my surprise, a few designers sell laser-ready map files. My favorite was one by a maker named Ivan on Etsy. Seventy dollars felt a bit pricey for a design file. Then I did the math on the full week it would have taken me to build my own, and I bought Ivan's instead. I'd do it again.
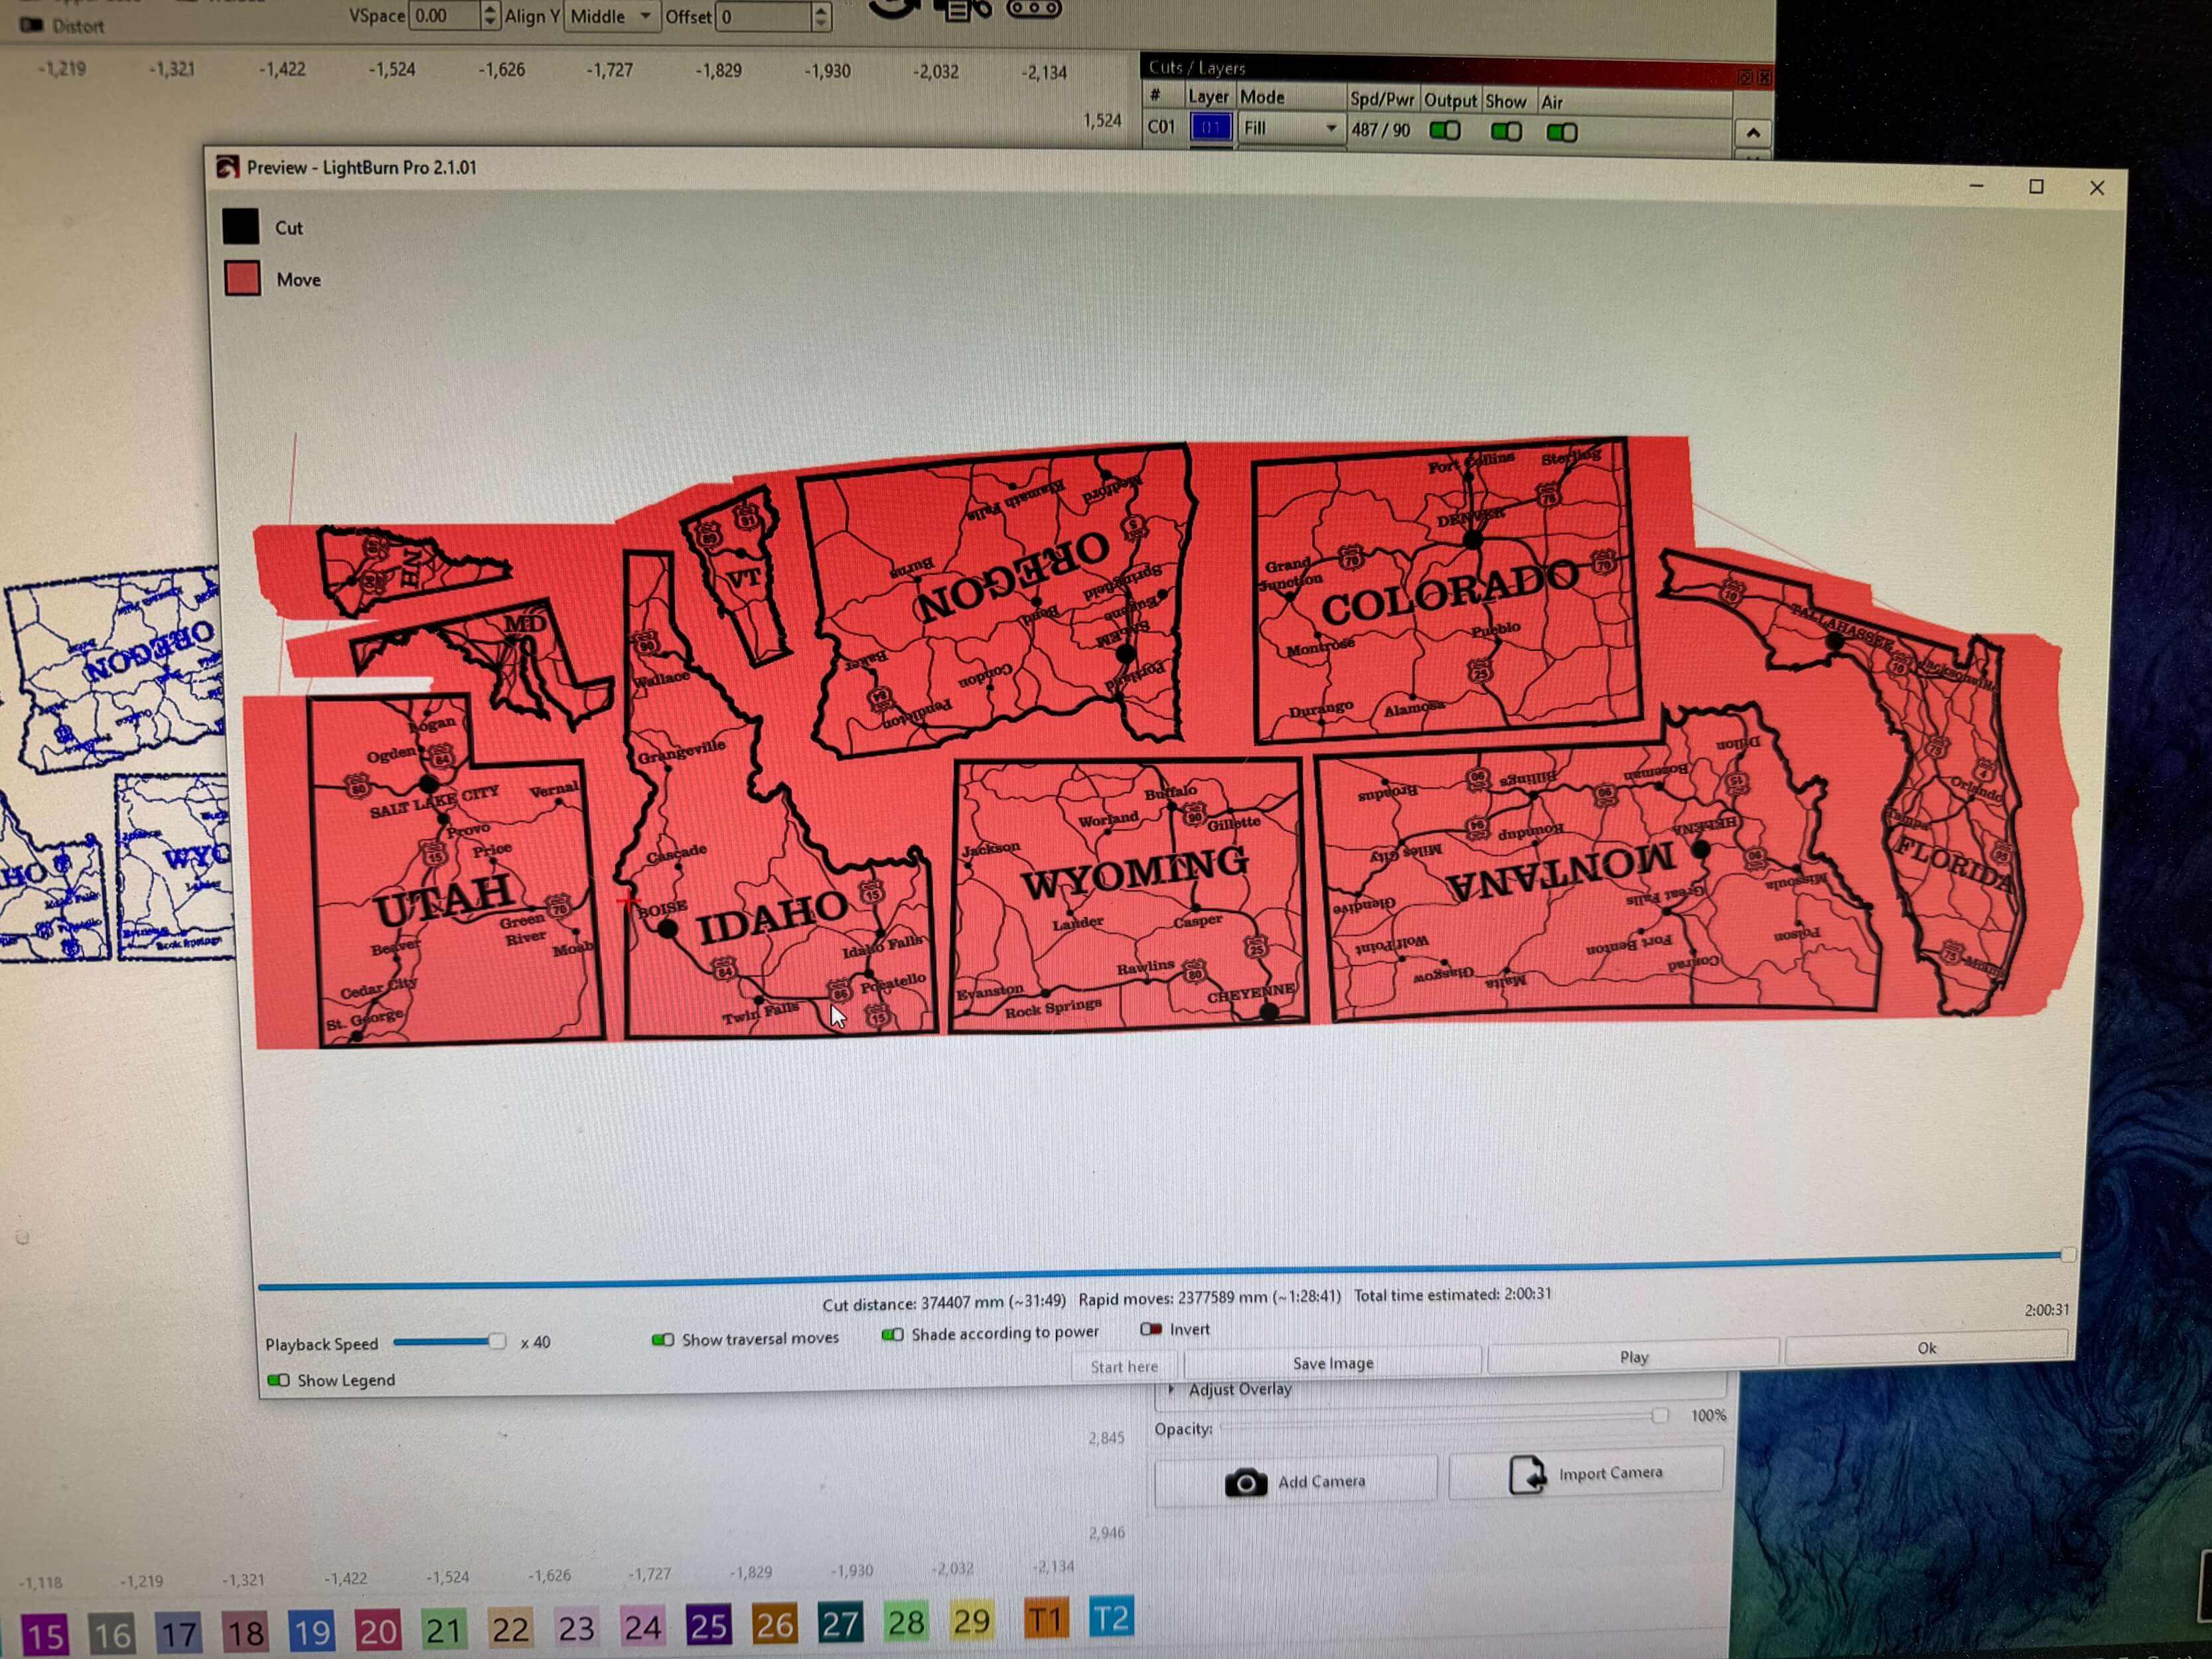
Ivan's file came split a bunch of ways, including all fifty states on their own. That was perfect. I wanted the map bigger than the laser's bed, so I had to cut it state by state anyway. I pulled the first state into LightBurn, calibrated the settings with a few test squares, and ran the preview.
Thirty minutes just for Oklahoma. If every state took that long, I was looking at twenty-five hours of run time. I did not expect it to take that long.
So I went looking for ways to speed things up, and that part turned out to be a lot of fun. Here are a few tricks I picked up, in case you ever end up doing this yourself:
• Speed and power go together. The fastest job maxes out the power and just changes the speed depending on whether you're filling or cutting. For a map, maxing the power worked great. For more detailed work, you'd want to slow down and stay in control.
• Watch the overshoot. The laser has to speed up and slow down at the end of every pass. All that slowing down is travel that doesn't burn anything. I found it's faster to place pieces side by side than stacked on top of each other, which cut down the wasted motion a lot.
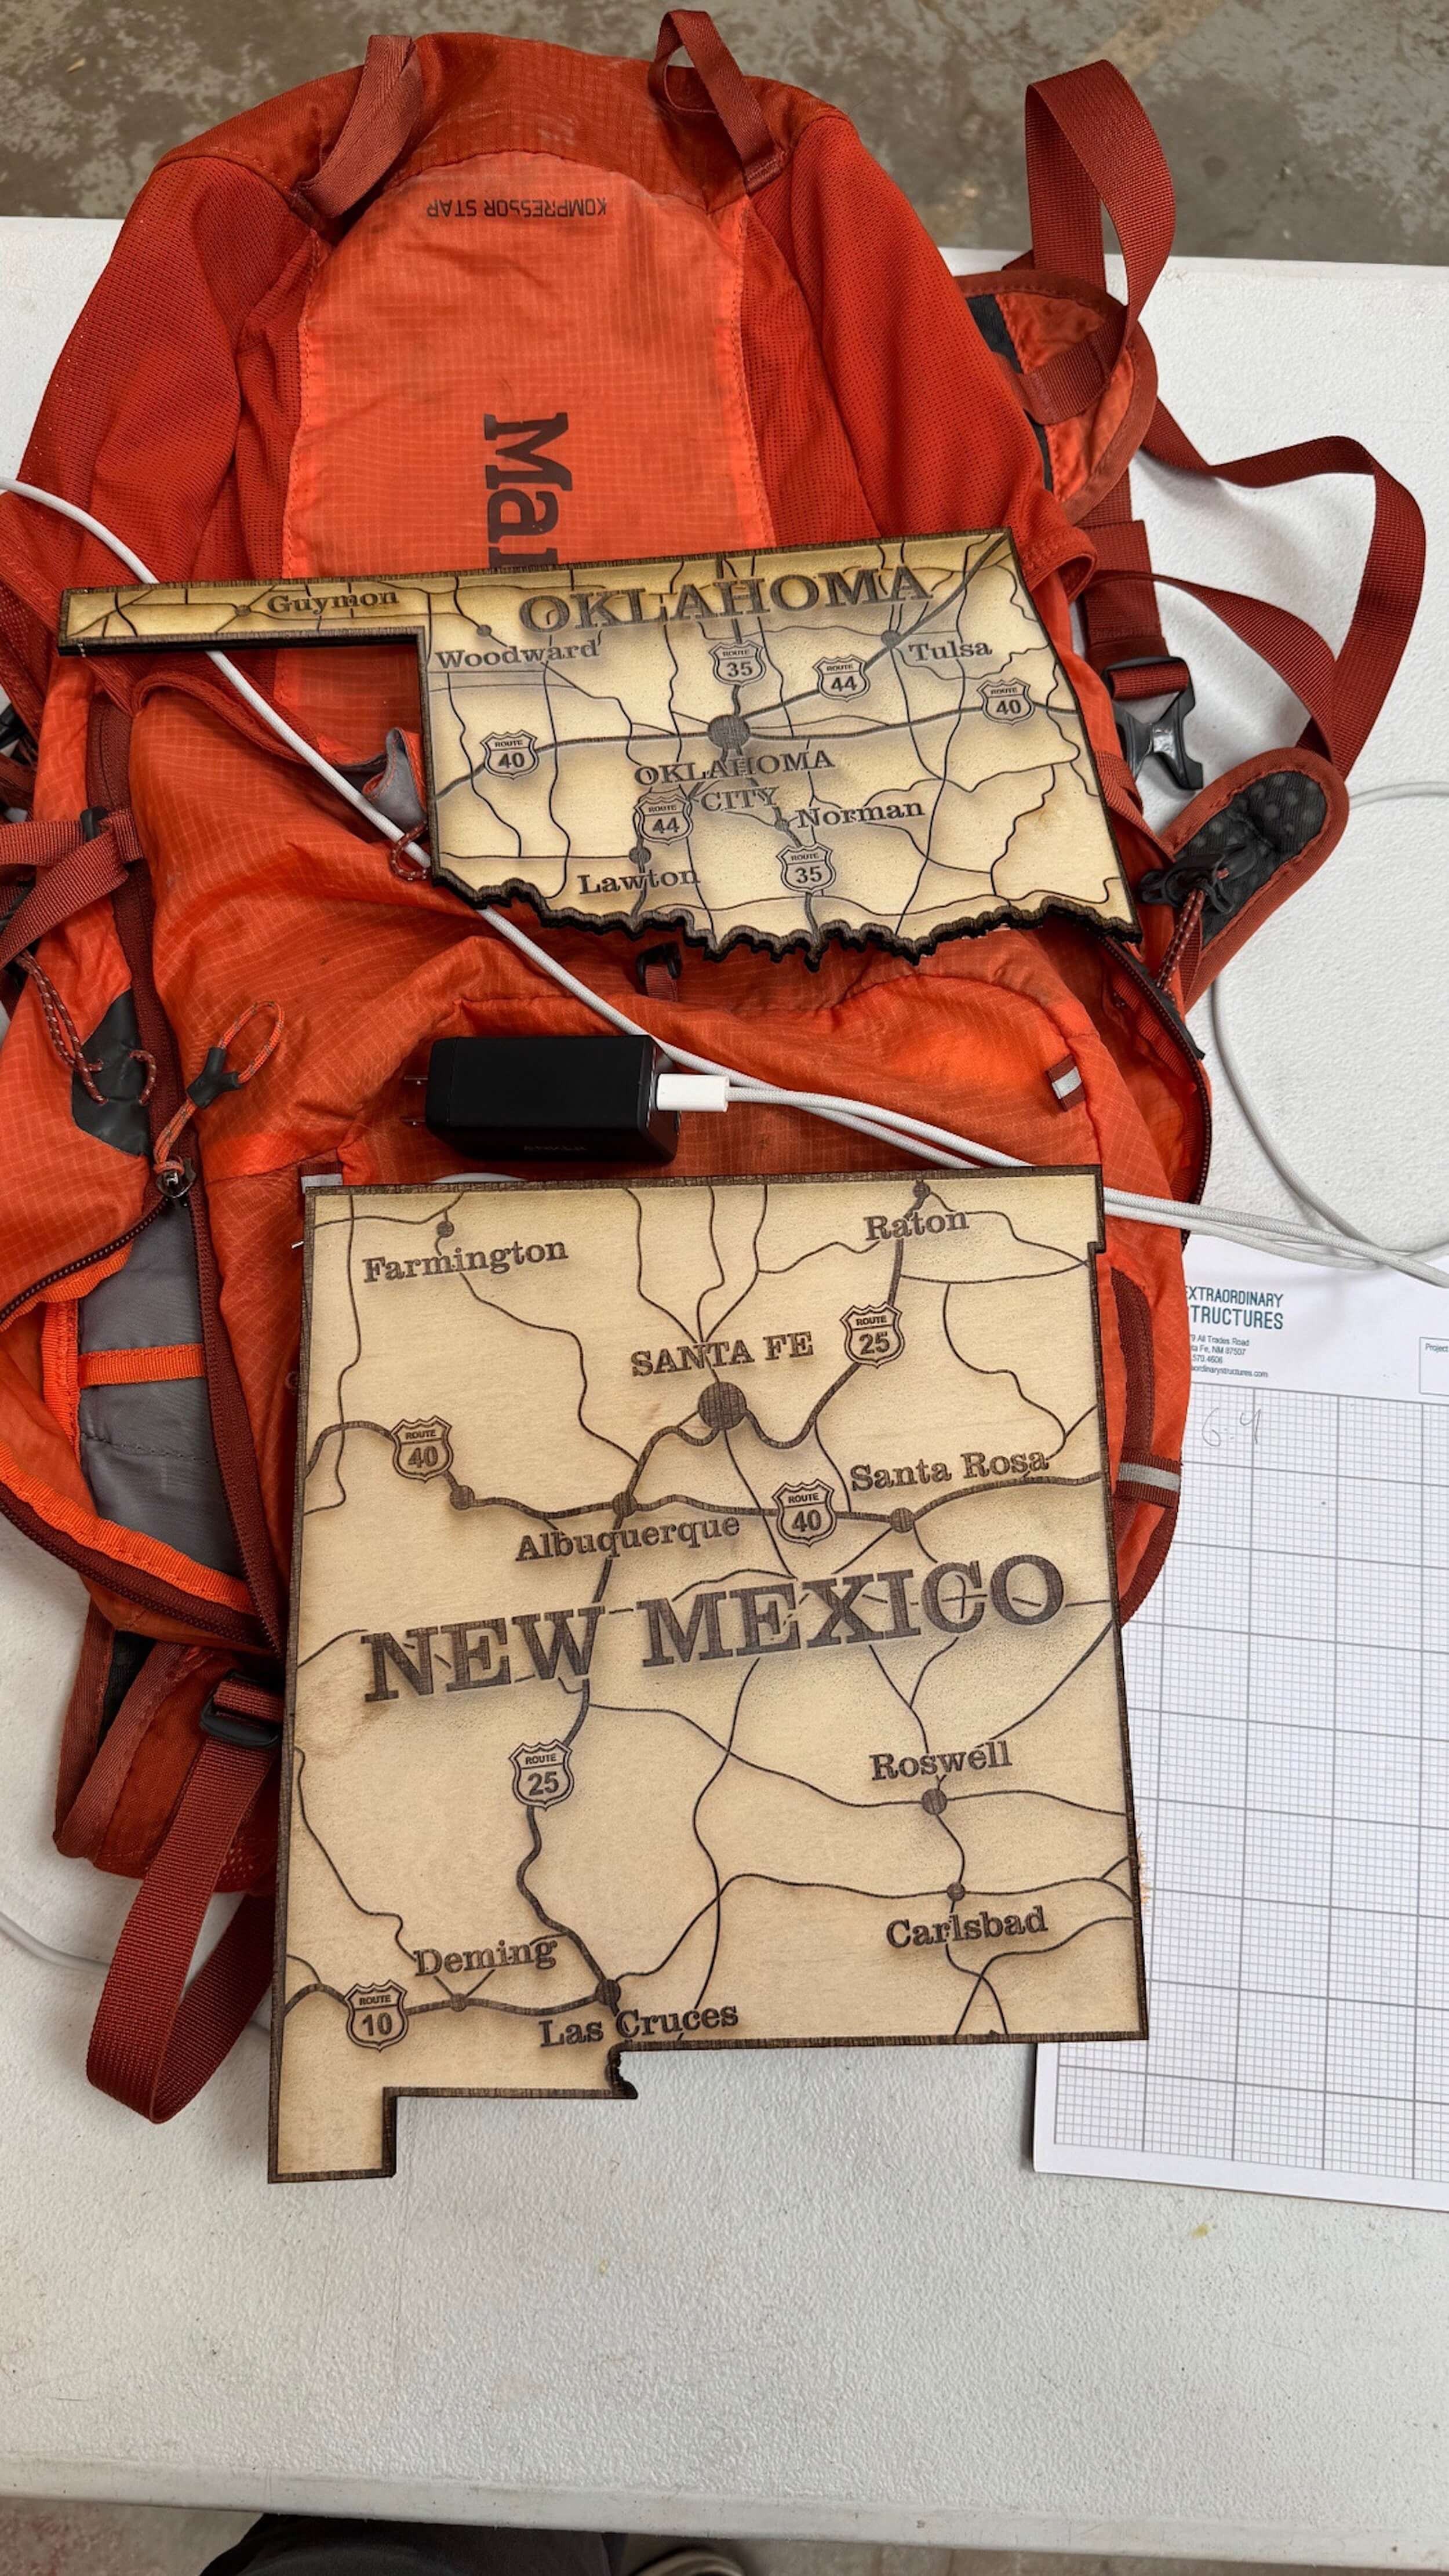
• Line interval is a big one. The laser fills like a printer, going back and forth line by line. There's a setting for how far apart those lines sit. I bumped mine from 0.1mm to 0.15mm and it cut about 30% off the job. That was hours saved. The fill goes a little less deep, but for this map it looked just as good. You can actually see the difference if you compare my Oklahoma and New Mexico pieces. Shoutout to Andrew for that one.
• Fill in the gaps. If the laser is going to travel across a blank stretch anyway, that's basically free time. Dropping a small piece into that empty space costs almost nothing, so you might as well use it.
Once every state was cut, there was still real work left. Each piece needed a light sanding and a wood finish to bring out the grain. Then I set a magnet into the back of each one so it could snap onto the booth backdrop. Fifty little states, one at a time.

And then finally the whole country came together.

Seeing it up at our first-ever booth made every hour worth it. People stopped, leaned in, ran a finger along Route 66, and took their guesses at the landmark game. It did exactly what I'd hoped it would. It gave folks a reason to slow down and stay a minute. I might be biased, but I think we had the coolest booth there.

Big thanks to Randy for teaching me the laser in the first place, and to Andrew for the tricks that saved me hours.
- Wes


